


Looking for help?
Find answers to your questions
How to view your Yeewise Cameras on Mac?
Table of Contents
1. Download ESeeCloud CMS Software
Download the EseeCloud CMS from Yeewise website:
https://www.yeewise.com/pages/app-cms
or from below link: https://drive.google.com/file/d/1gKRlBZMf9sVW9cE25EgY_y96Wbz7Y-4V/view
2. Install and run ESeeCloud CMS on your Mac.
Install the CMS on your Mac and run it. If you have problem installing ESeeCloud CMS to your Mac, please refer to,
Mac OS Sierra Gatekeeper stops me from installing Mac EseeCloud App. What should I do?
3. Login ESeeCloud
There are two ways to login ESeeCloud: Login Local and Login Cloud.
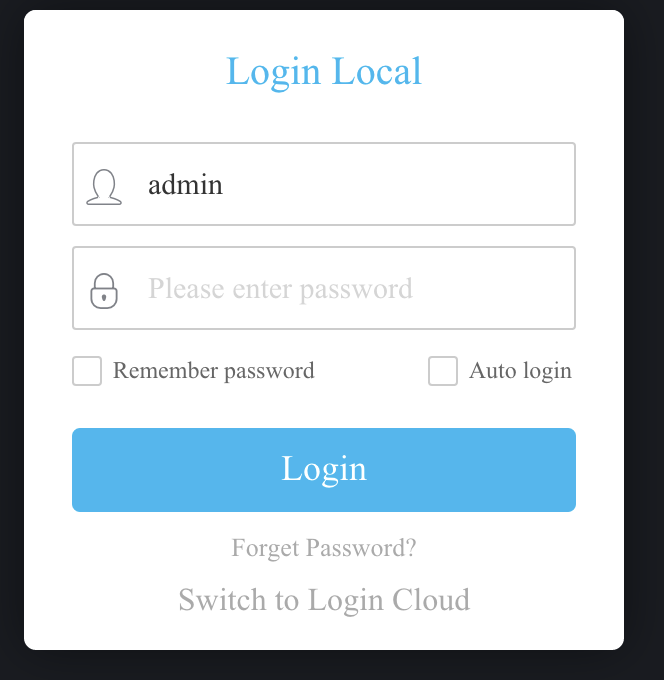
3.1 Login Local
The default username is "admin", default password is empty, leave it blank.
Login local will require you to add your device to the CMS manually.
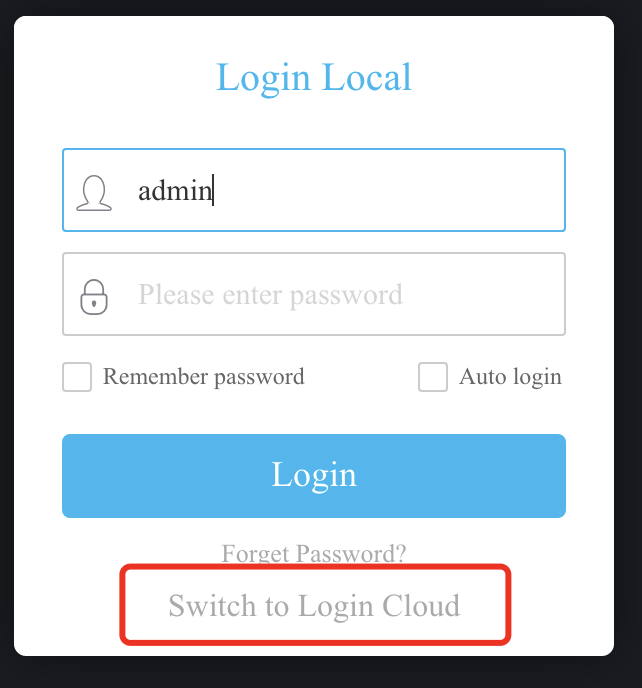
3.2 Login Cloud
On login interface, click Switch to Login Cloud at the bottom. Then login directly with your app account username and password. Devices added to the app will then be synchronized to the CMS, you won't need to add them manually.

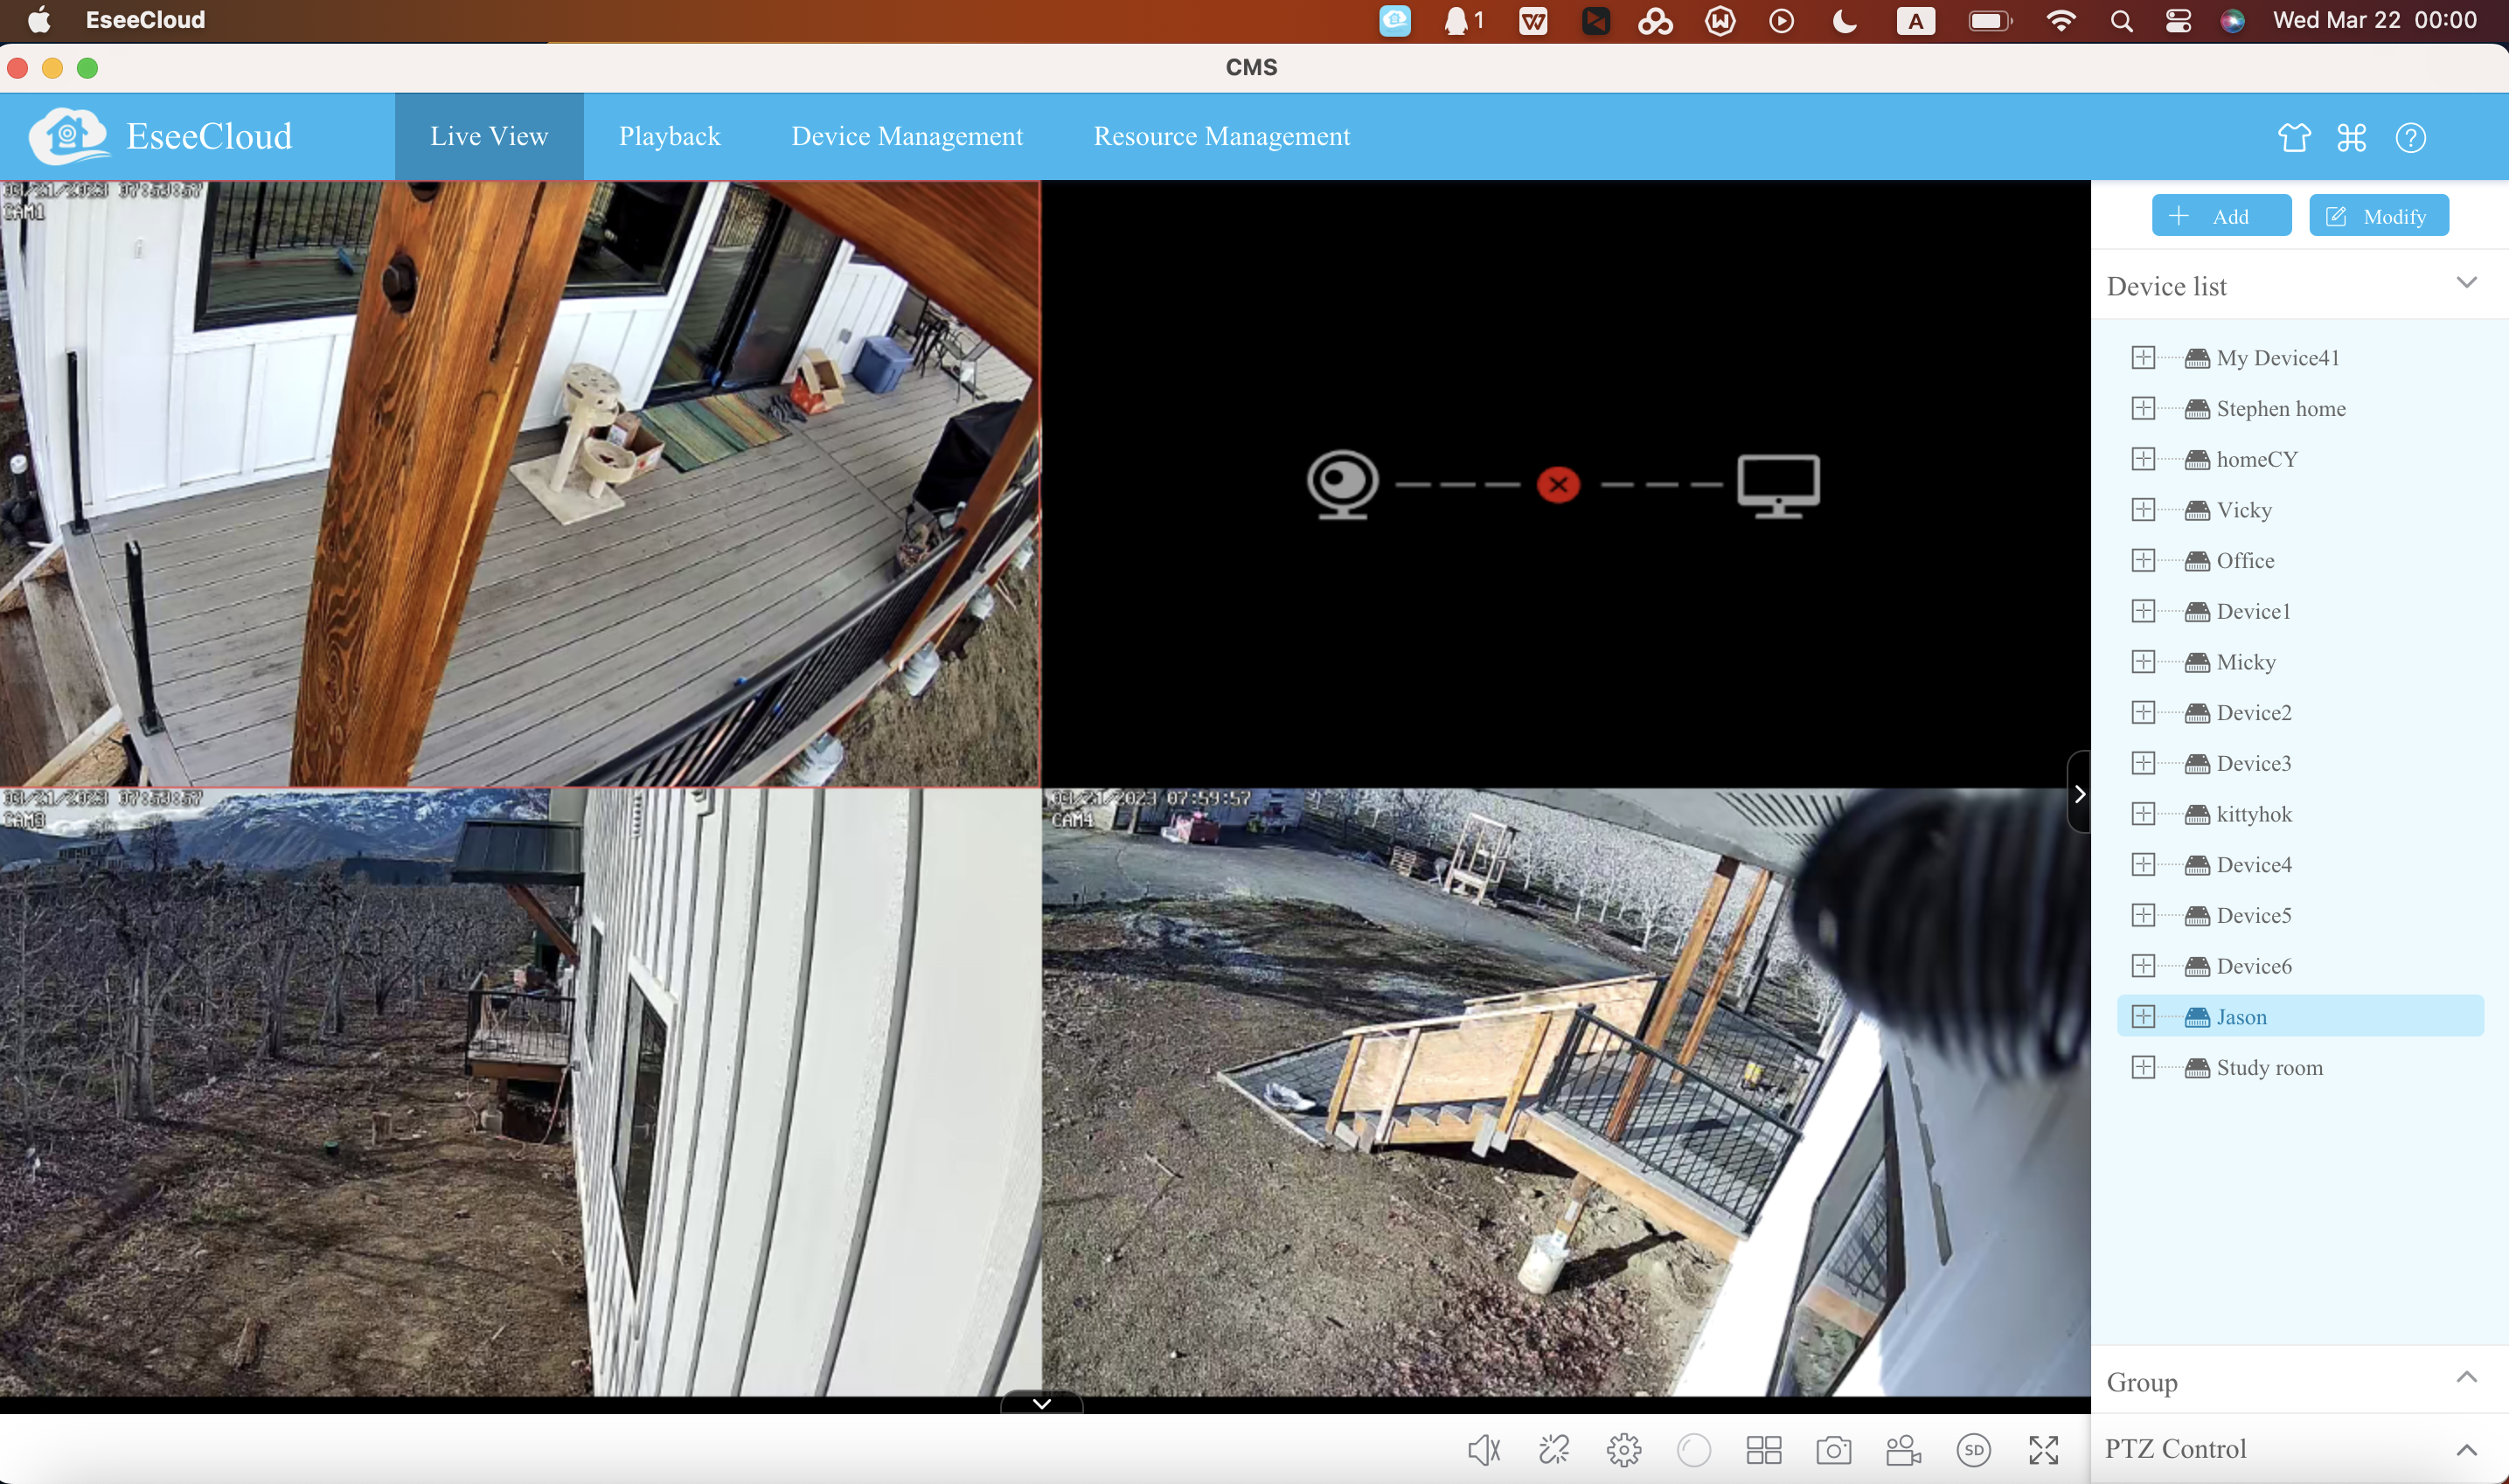
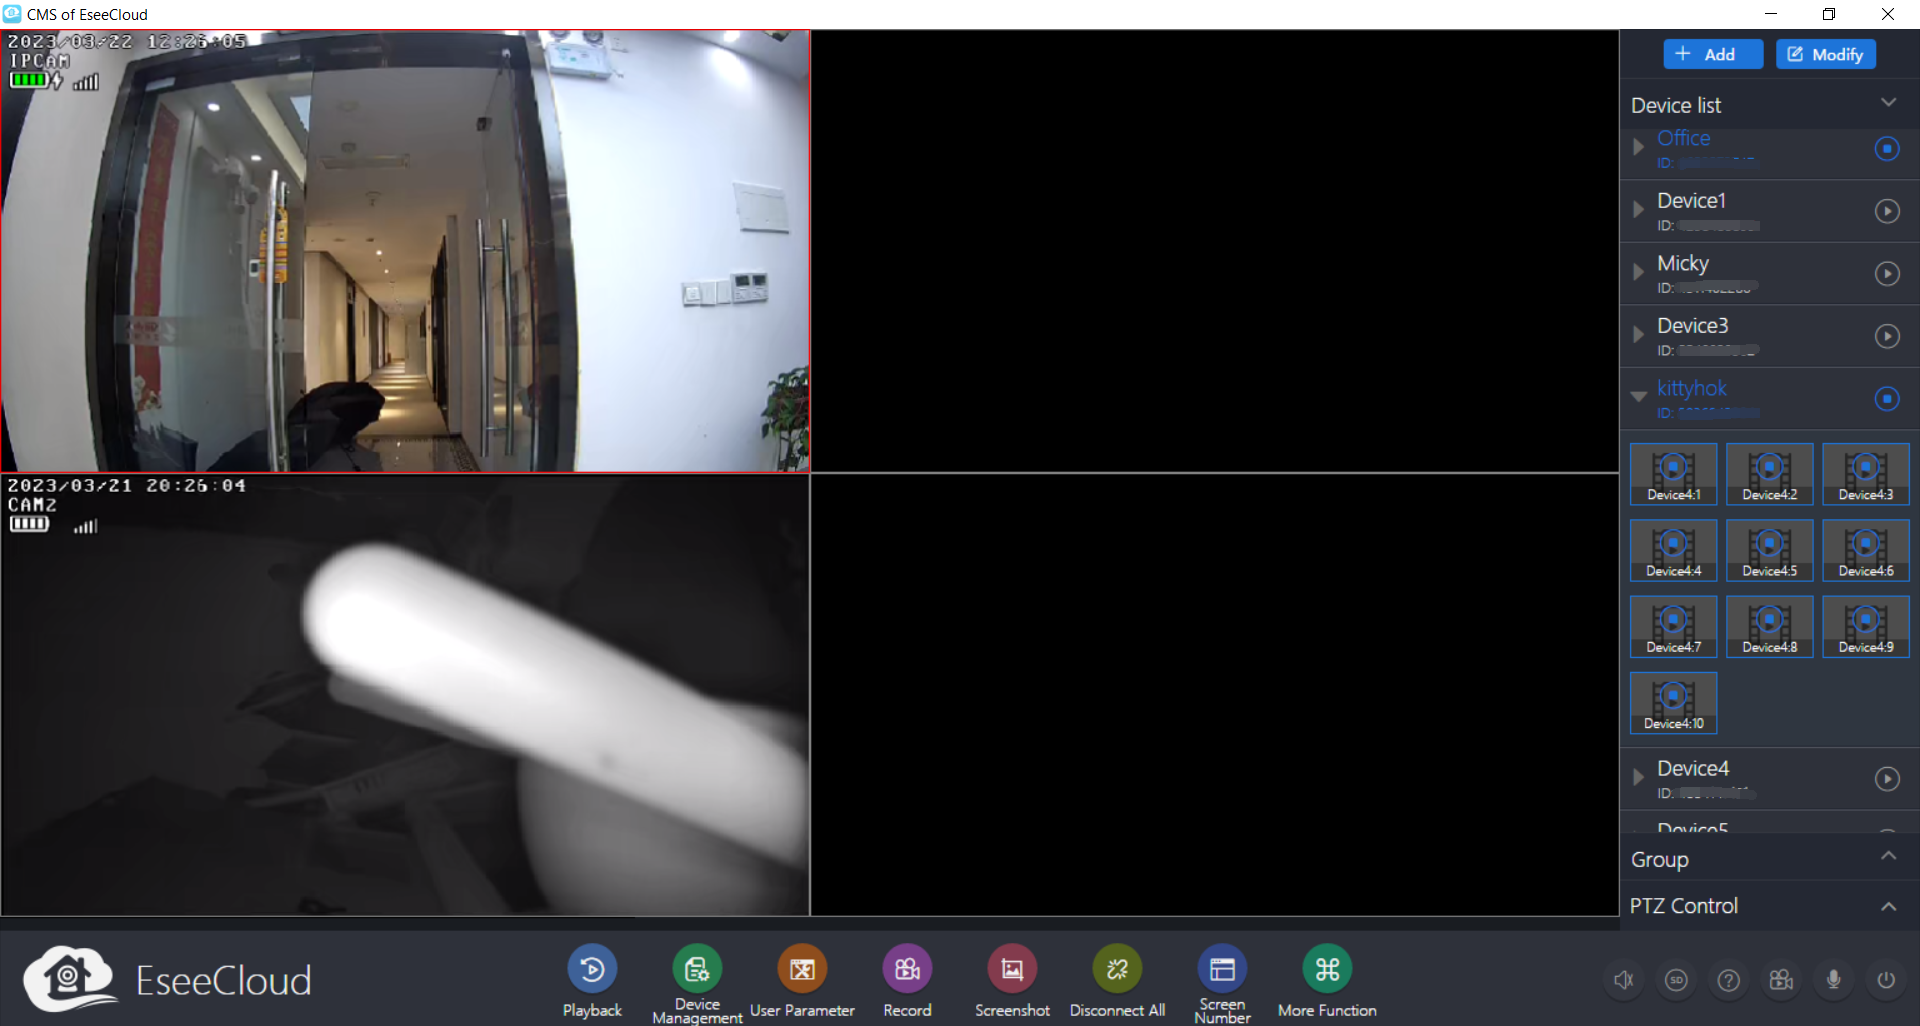
After login cloud, your devices in the app will be synchronized to the CMS, double click on the device to start live view.
If you choose to login Local, you need to add your device to the CMS manually after logged in.
4. Add Device to ESeeCloud CMS
There are two ways to add the device to CMS:
4.1 Auto add, applies to add devices in LAN
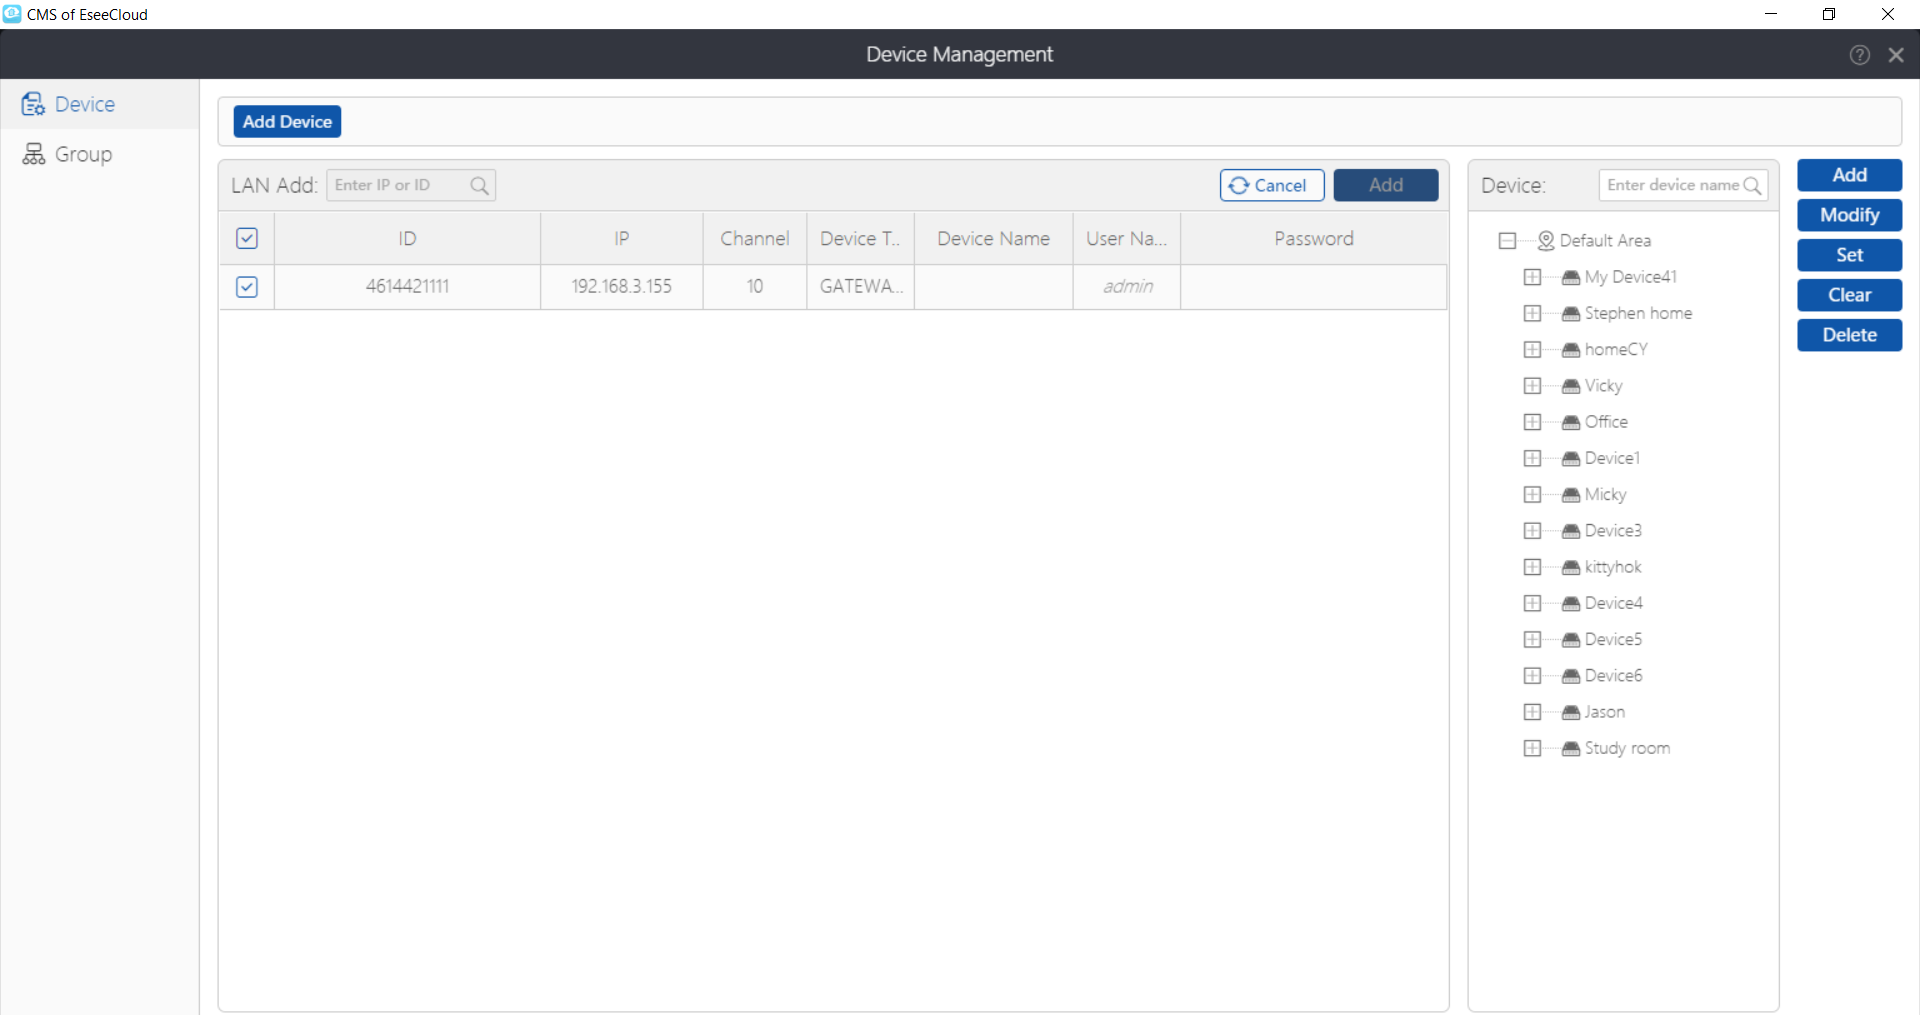
EseeCloud CMS will search the devices in LAN automatically and display them in the Device Management list.
a. Click “Device Management” at the bottom, you’ll see your device(s) listed there.
b. Select the device(s) and click Add. Your device(s) will be added to ESeeCloud CMS. They will show on upper right.
c. Go back to Live View, and click on the "play button"  next to each device to preview.
4.2 Manual add, applies to add devices remotely
If you want to view cameras from a remote computer, you need to add the device to your ESeeCloud CMS manually on that computer.
a. Run and login ESeeCloud, then click “+ Add” on top right corner. Or click “Device Management” at the bottom.
b. You’ll see below interface. There are two ways to add device to ESeeCloud: Add cloud ID and Add IP/DDNS.
Add by Cloud ID: Add device to ESeeCloud with your NVR’s Device/Cloud ID. It is available for local and remote access.
Add by IP/DDNS: Add device to ESeeCloud with your NVR’s IP address. It is available for local access only, so if you want remote access your cameras on this computer, choose the first Add by Cloud ID.
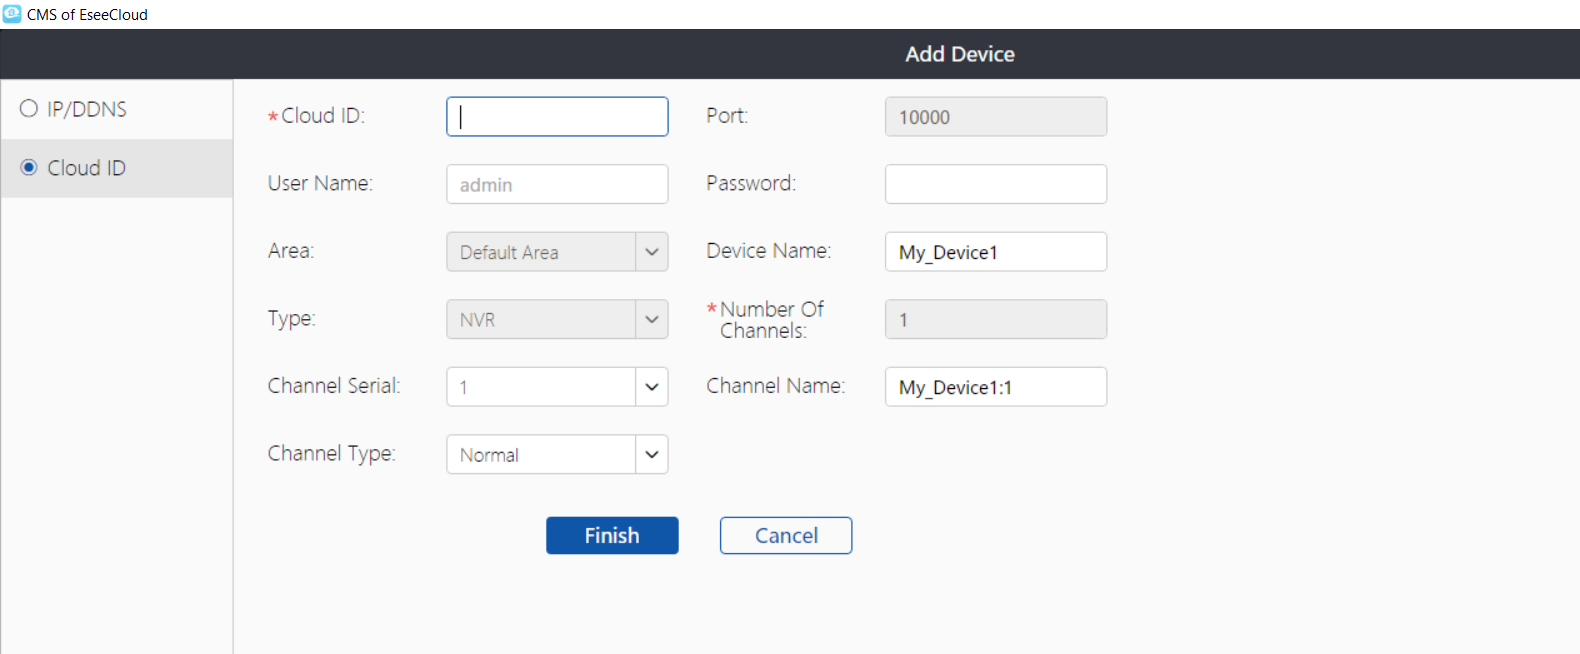
c. Type in the information required and click “Finish”, the device will be added to this ESeeCloud CMS, you can preview the cameras now.
NOTE: Please note that User Name and Password here is NVR's login username and password.
5. Introduction of Icons
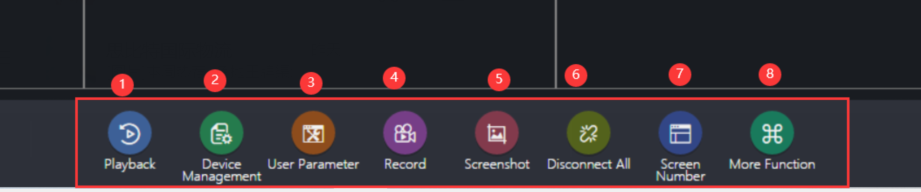
1. Playback: Allows you to playback videos on CMS
2. Device Management: Allows you to manage your devices on CMS
3. User Parameter: Allows you to do some basic settings and advanced settings of CMS
4. Record: Record a short video and video will be saved to your computer
5. Screenshot: Take a snapshot and pictures will be saved to your computer
6. Disconnect All: Allows you to disconnect all cameras
7. Screen Number: Allows you to choose how many cameras display on screen at a time, supports display 64 cameras simultaneously
8. More Function: Allows you to check screenshors, videos, alarm messages and change your password.
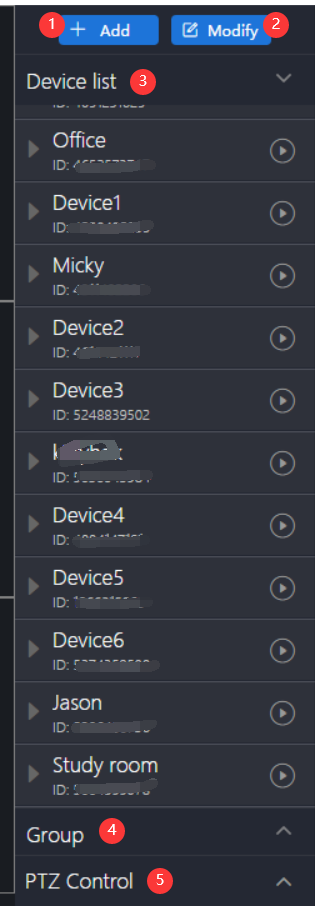
1. Add: Allows you to add new device to CMS
2. Modify: Allows you to change device information
3. Device List: List all your devices added to CMS
4. Group: Allows you to group cameras from different systems
5. PTZ Control: Allows you to use the PTZ Control to control PTZ cameras
For more questions about this ESeeCloud CMS, please contact Yeewise support at support@yeewise.com